Making of the Book Nook
What is a Book Nook?
It’s a creative addition to your book case, you can buy them or make them yourself. It’s a diorama of something you like, it can be a street, house, room,…
I’ve always wanted to make one and since I have time it was the ideal moment to do so.
My brother and his wife have a love for Steampunk and have a lot of cats. Here I depicted 2 of them.
They also like board games so I put a few in the book case. I challenged myself to make as much by hand as I could.
In the next pictures I will give more details and explanation.
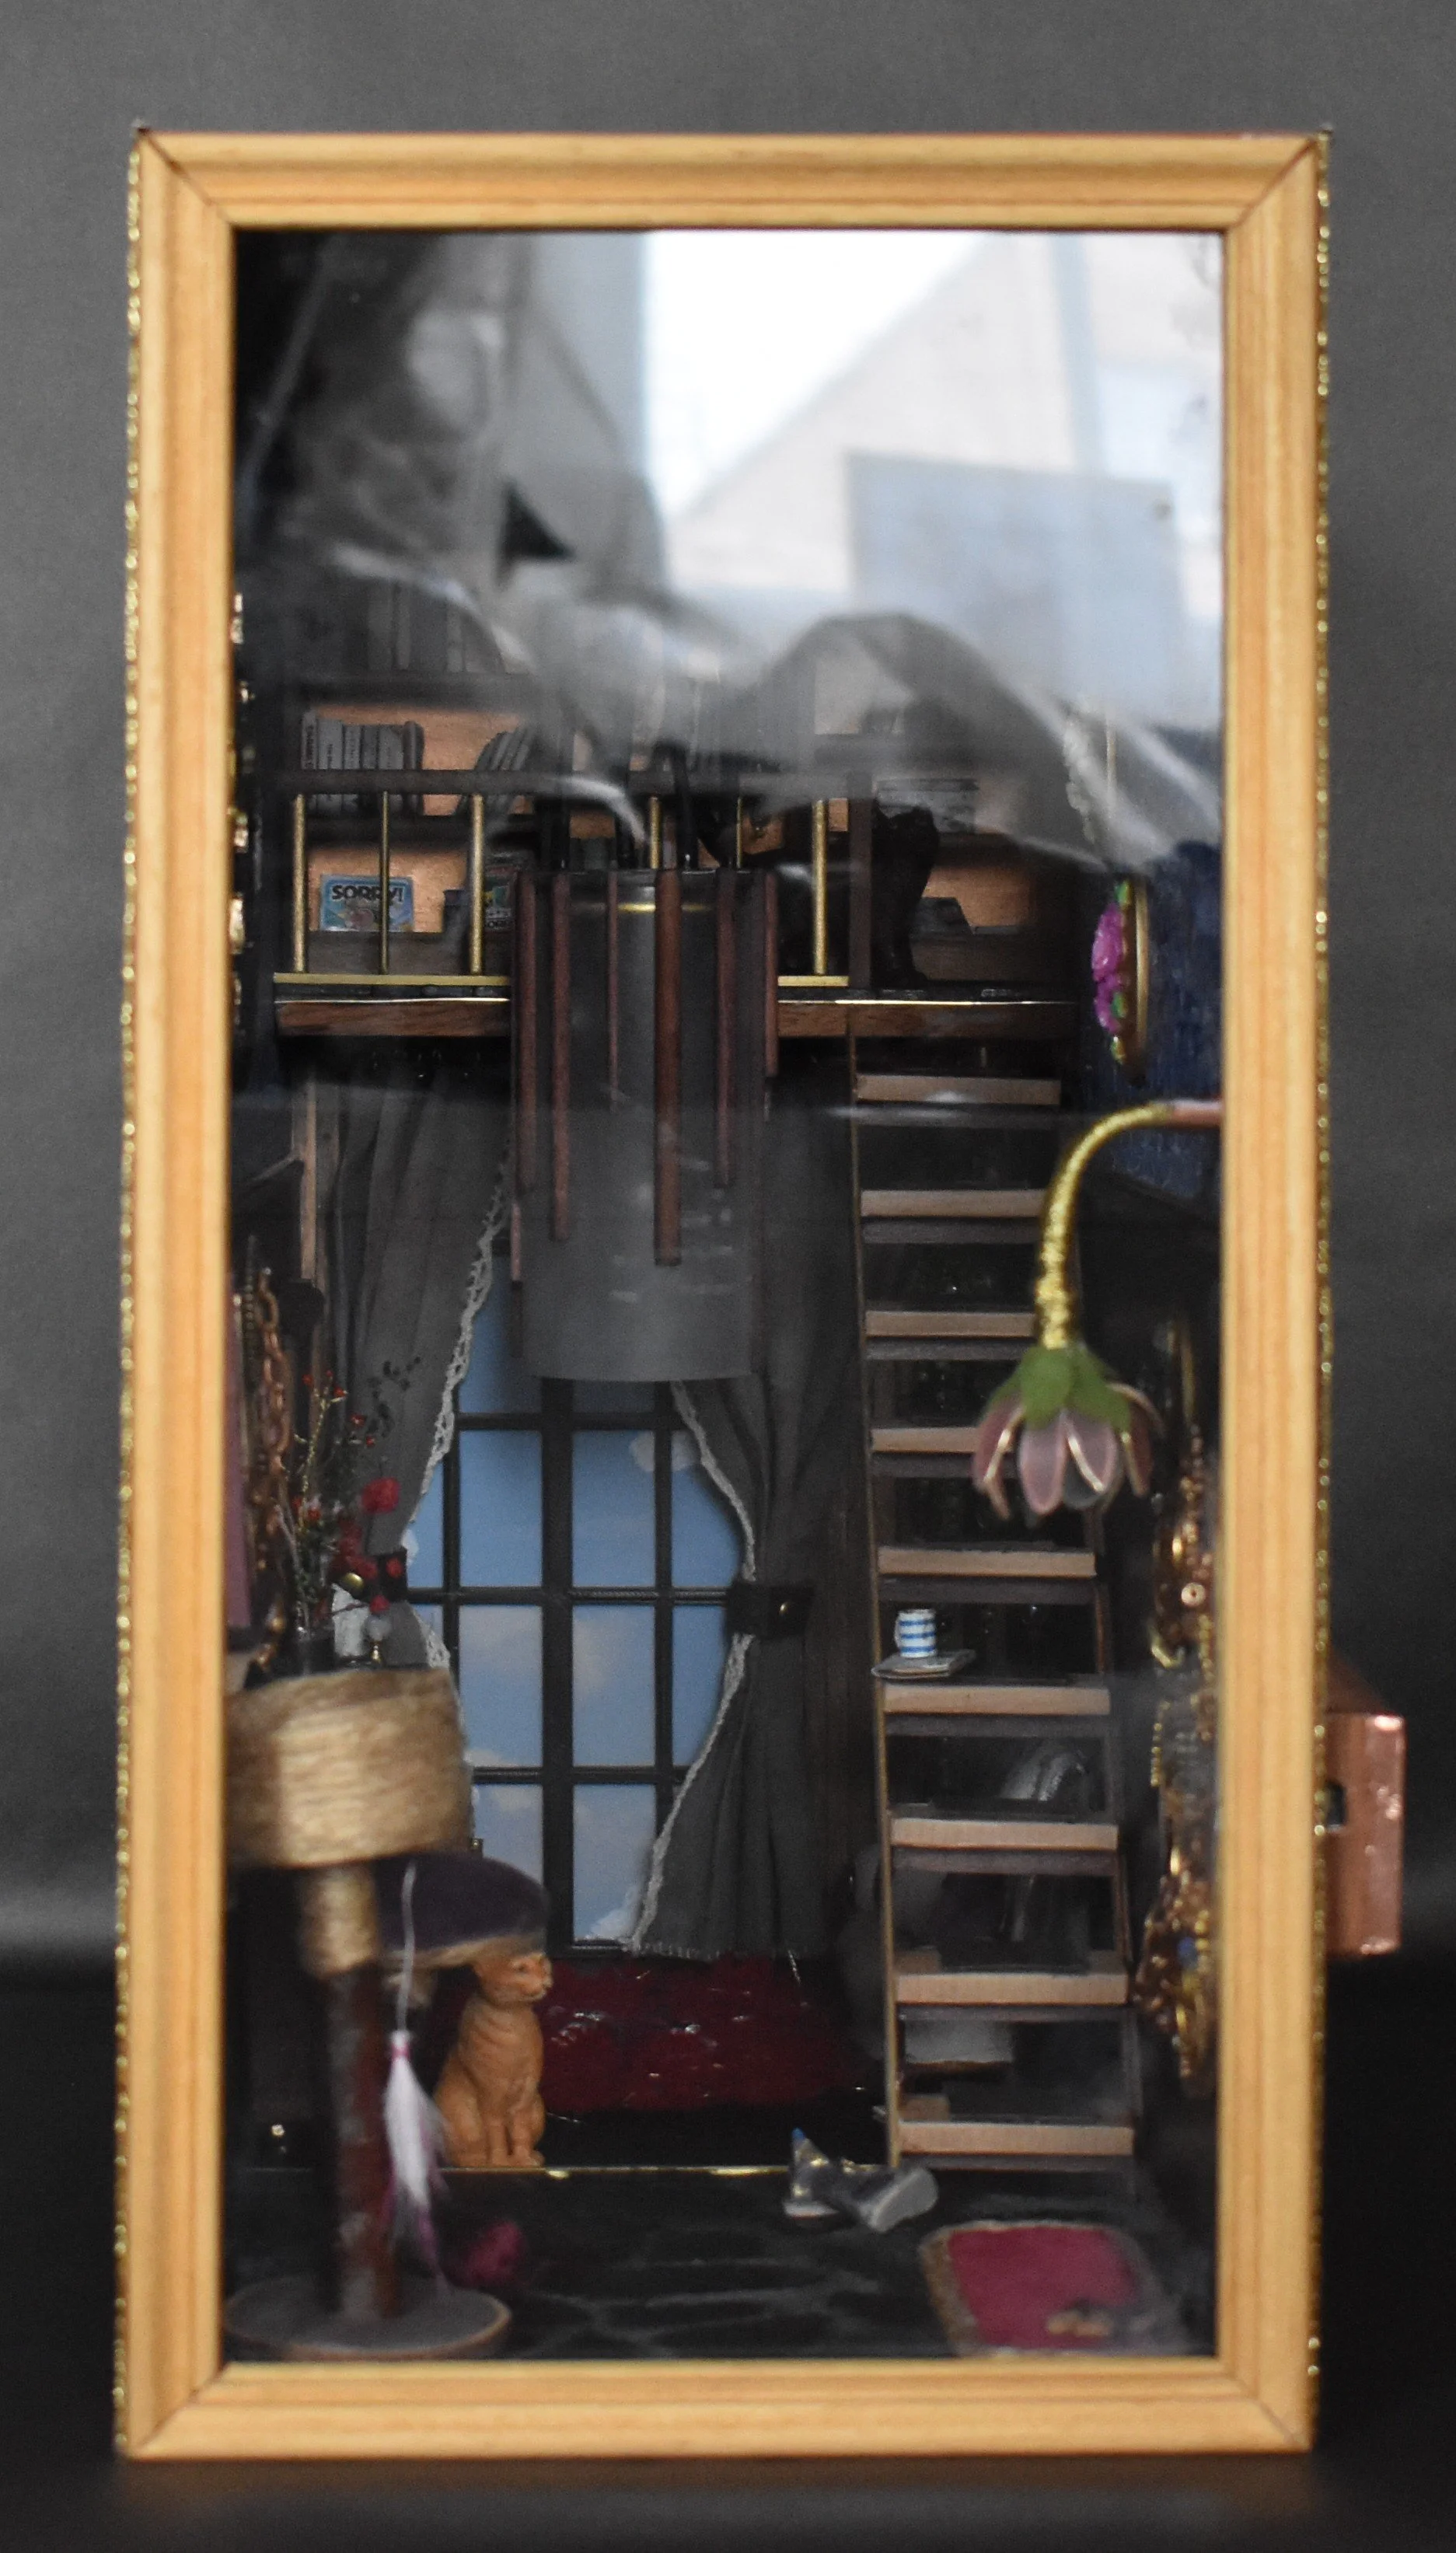
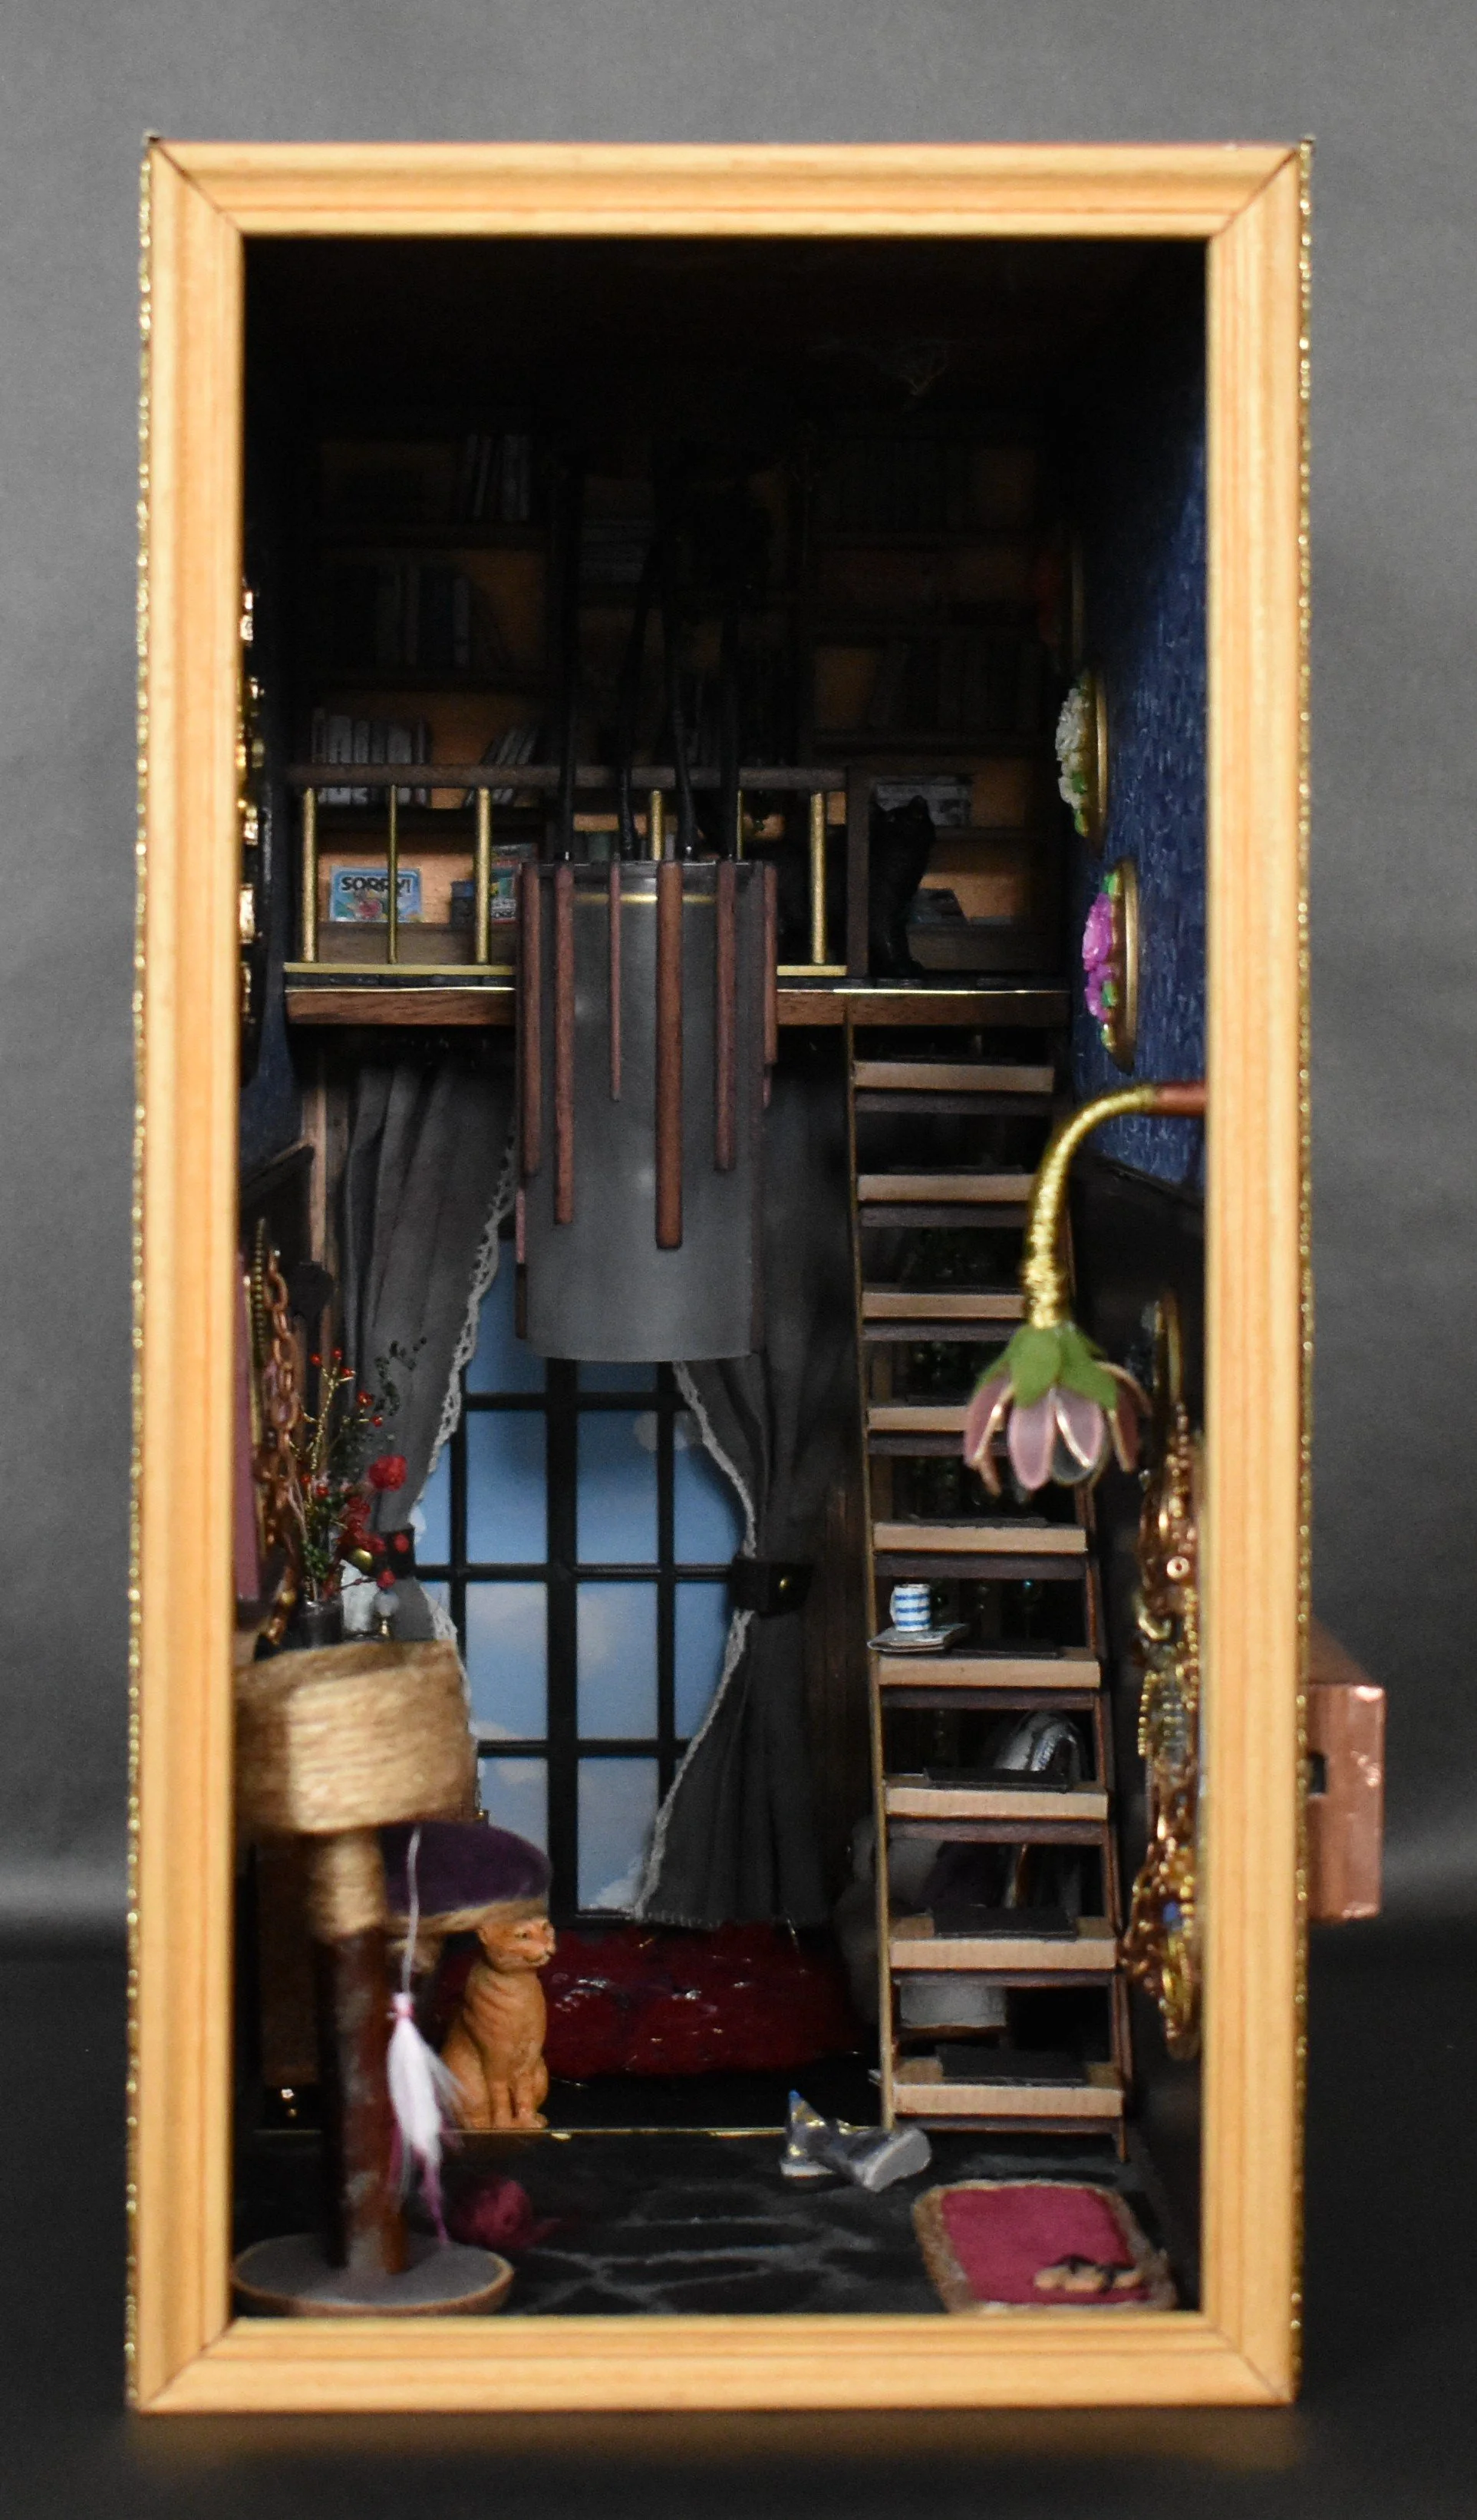
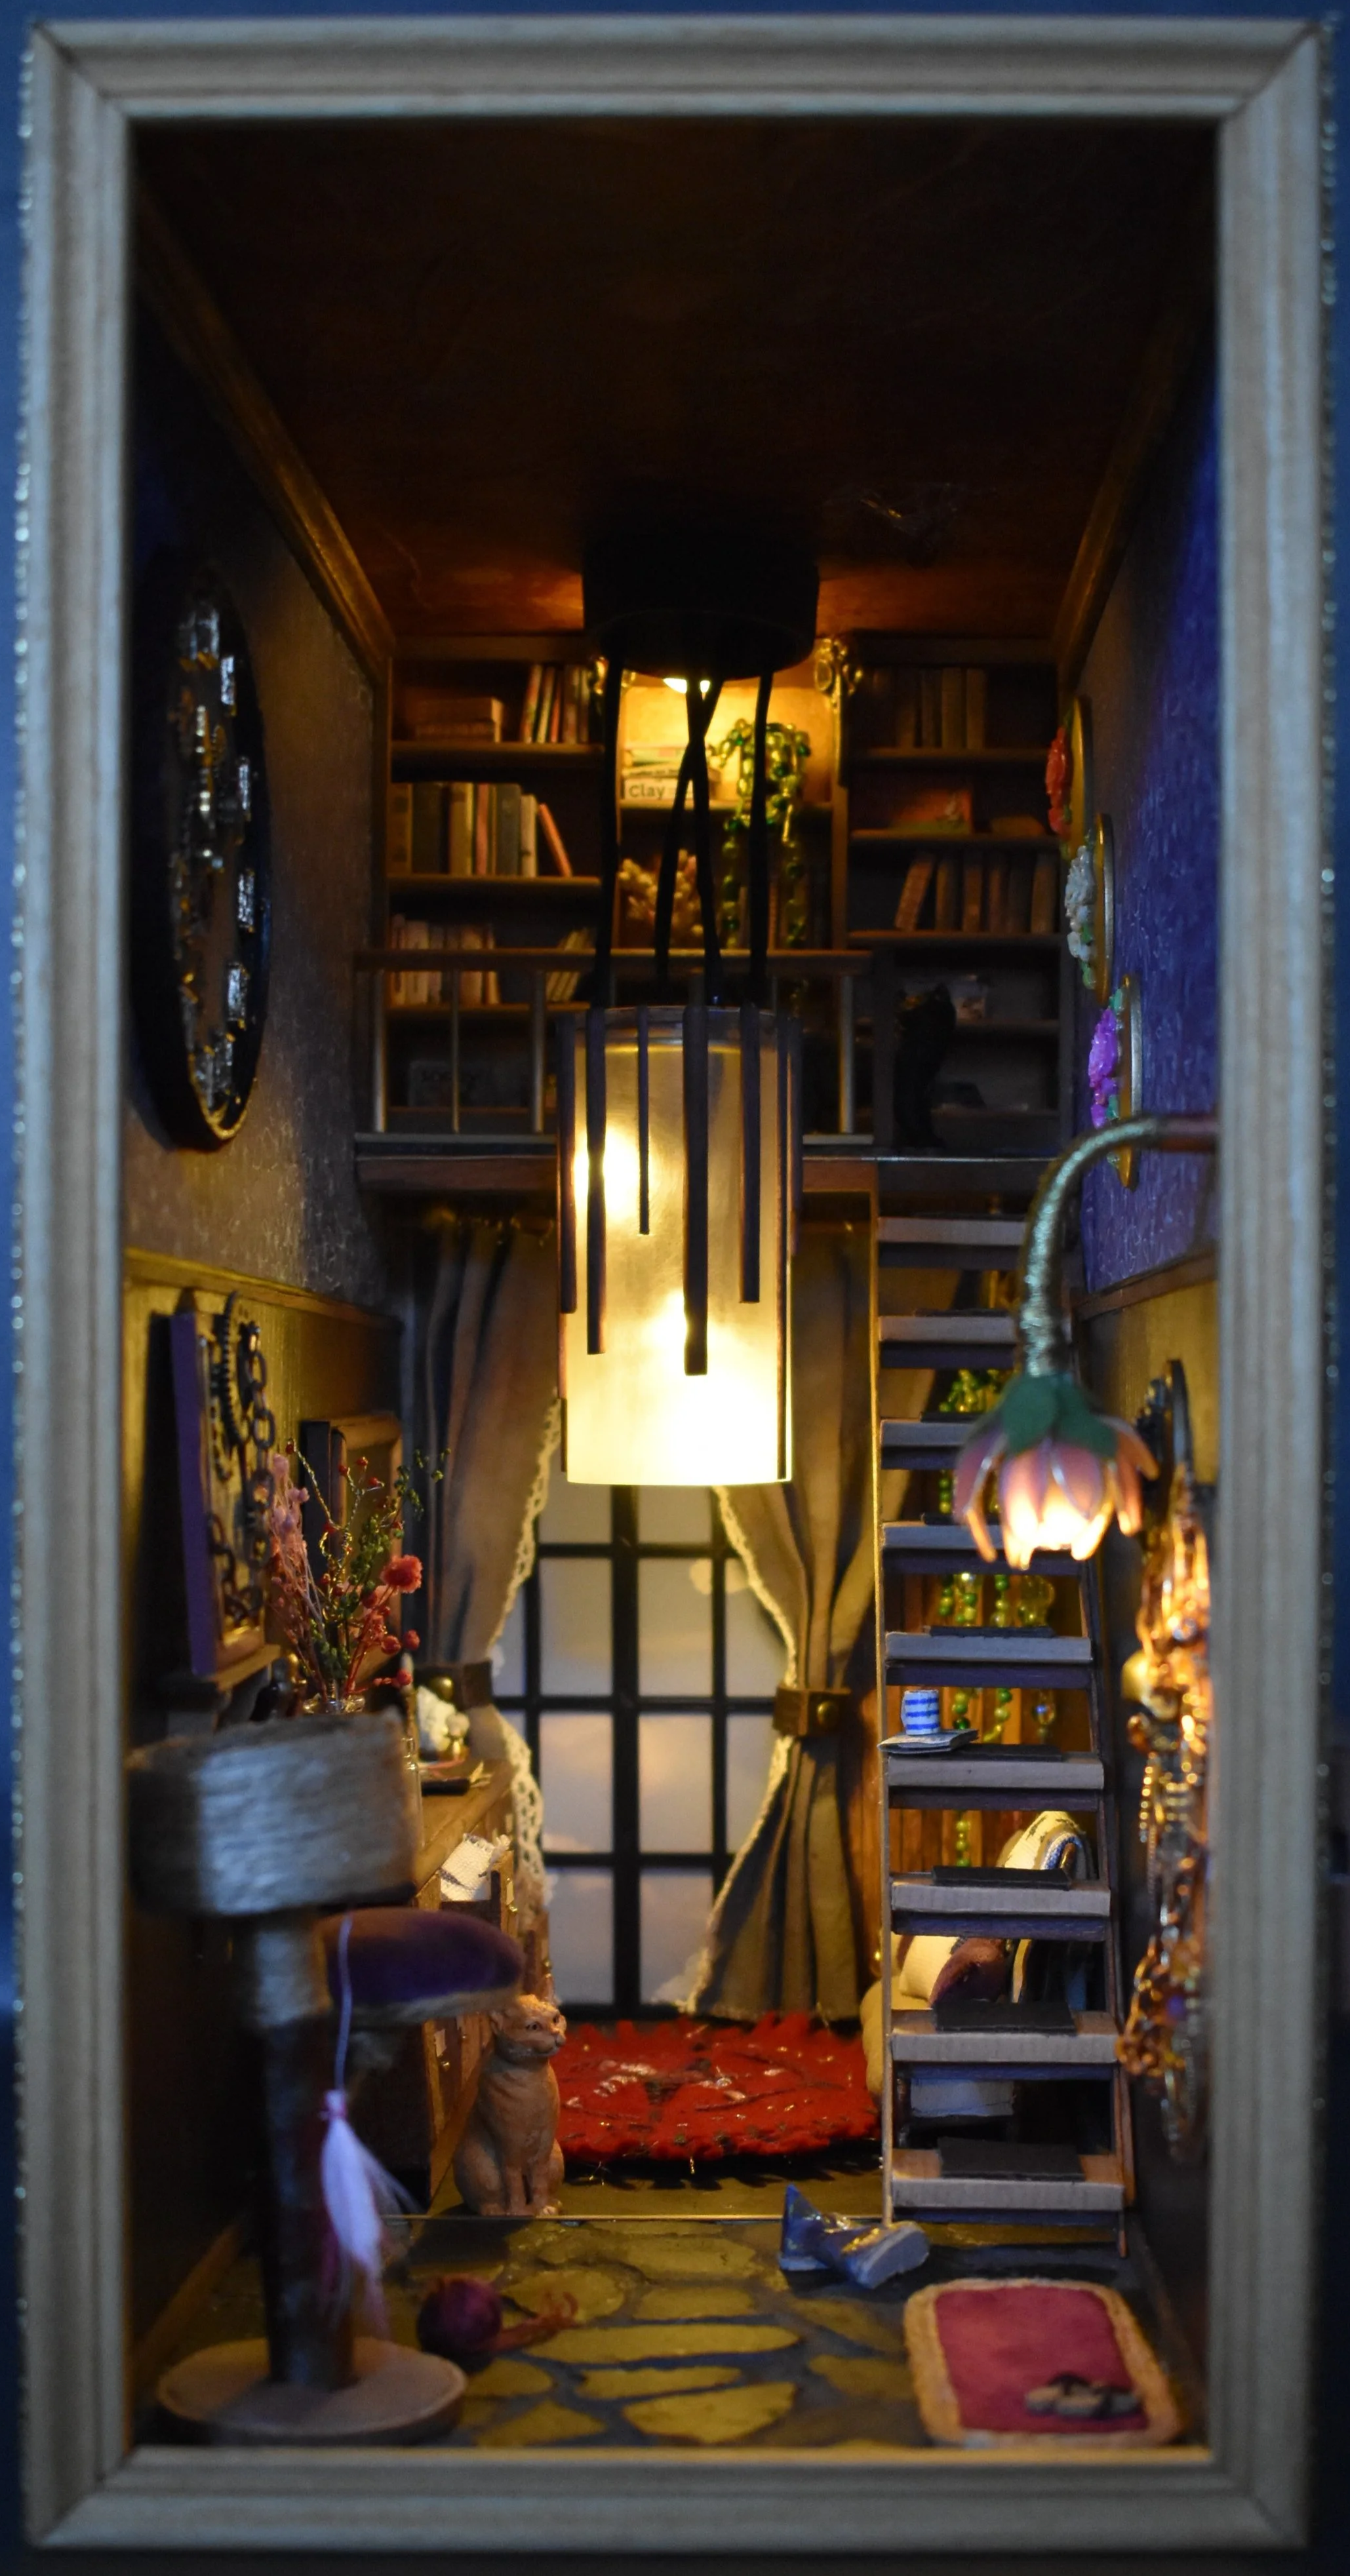
Book Nook
A view without the glass, with and without the lights on.
Side of the Book Nook
I added a few details around the front and the battery case. I also added my logo. You can see where my wires are under the carton. But no one sees it once it is placed in a book case :).

I started with scraps of wood and cardboard. It's based on the size of a compartment from a Kallax cabinet.

Another look from the other side.

I made this in Tinkercad and printed it in PLA.

This part of the clock is painted with black acrylic.

Details were added in acrylic and gold alcohol ink.

The sofa I downloaded is from printables.com and is also printed in PLA.

The sofa got details added in acrylic paint and leather.

The book case is made out of cardboard, the details are copper acrylic paint and fine paper with wood details.

Details were added in fine wood.

Tiny books! I searched the internet for book covers that I could print, scaled them and printed them. Cardboard was cut in the right size and the covers were glued on them.

A finished look of the pile of books.

This were the first finished items, but details were added later. It's all in the details...

The big chandelier, this was a happy accident. I saw an empty packaging from washi tapes and sanded the outside and made the necessary adjustments. I added details in wood and made holes for the lights.

The after and before. I bought them as before, painted them with red, white, purple/pink and black flowers.

I wanted cats in the Book Nook and I wasn't going to make them from scratch so I painted 2 cats I bought from the store. This one is the before with a magenta base coat.

This is the finished cat Kenshin.

I embroidered the felt, did this mostly in bed because it's really relaxing :).

The finished carpet.

The mess I made making the tiny lamp.

The tiny light. I added some green felt as detail after taking this picture.

I wanted a mirror but the only thing I had were tiny square tiles of mirror. I glued them on a piece of paper, added a boarder around it so everything was flush. Added foil over the piece, drew an oval and cut the boarder off it. I wanted to protect the mirror part from glue and paint. After I added the new boarder and paint I removed the foil and added the last details.

The finished result.

This is a picture I took from the lights I used in the Book Nook. I removed the white bulb thingy and seperated all the lights. Disconnected them from the power source, I used 1 white bulb and the rest got another shell.

For the cabinet I used 2 types of cardboard. The open spaces are for an open drawer.

Details were added in wood and thin paper with rusted details. A lot of wood I also stained with a home made stain.

The finished result.

The first wood part I made from pieces of wood cut on an angle and glued them in a pattern. I glued them on a paper that was cut on size to insert in the Book Nook. It was also stained. The front part is seashore decoration glass, glued them in place and then added mosaic filling.

After I filled in between the glass I painted them so it looked like stones. In this picture you can also see I added 'wallpaper' to the back of the Nook and the ceiling. I also hung the chandelier, the cork came loose, I fixed this by adding glue instead of only double sided tape.

I made the steps of my stairs with cardboard and brown wrapping paper.

Making stairs was a lot more calculating than my ADD brain thought... But after a while I figured out how to make them and it kinda worked. It's a bit off here and there but for a first time it was a good result.

I'm learning to take pictures, I only took this one to send to my sister :). It's a tiny cat tree.

My finished tiny shelves, it's made from stained wood and cardboard. The cardboard got a wrap of wrapping paper.

The spider I made from pearls and gold wire. I painted the green pearl.

The spider got a webbing from hot glue. I added this one to the ceiling, I needed something the black cat was looking at.

This is the only wallpaper I made myself. I drew the flowers in white gel pens and let it dry. After that I made my own color that matched my curtains and painted over the white flowers. This is the result :).

Another print I drew in Tinkercad and printed in PLA.

I spray painted the window frame, added a picture and chalk paper to diffuse the picture. The darker blue is from the glue I used, I fixed this by adding clouds in white acrylic pens.
The Book Nook in detail


